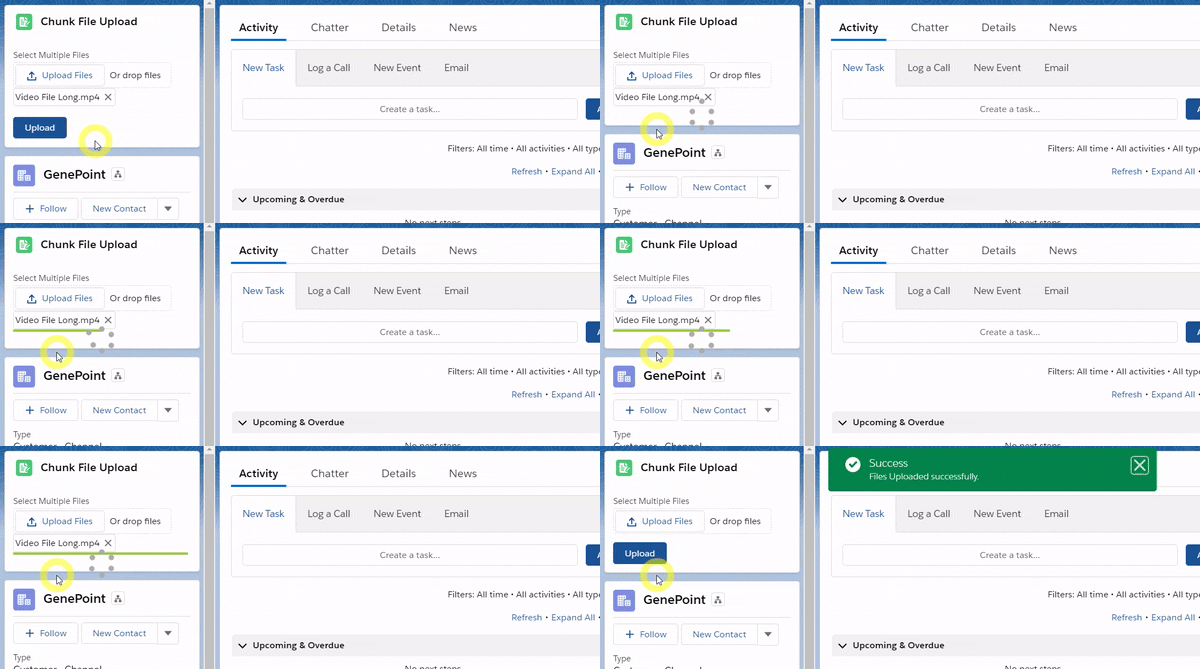
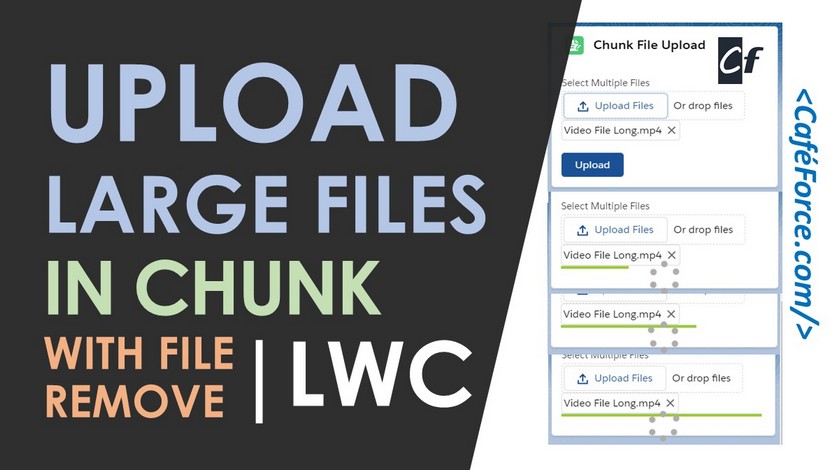
When working with large file uploads, sometimes it takes much time to upload the big files. Resulting, heap size error or CPU time limit error may occur. Also, you have no idea how much part of the file is uploaded. With the help of this code, you can upload the File in Chunks easily and can also customize the Chunk size. I have also added the progress bar indicator so you can see the file upload progress. Also, you can’t see or remove the files which are uploaded in the standard Lightning-input, you need to refresh back your page to remove the uploaded files. With the help of this code, you can remove the uploaded file easily. You can see the uploaded file name as well.
Component Features:
- Upload file in Chunks
- Uploaded file names will be visible below file upload.
- Ability to remove uploaded files.
- Customize your Chunk size as per need.
- Progress Bar indicator for File Upload Progress.
Component Preview:

Step-1: Create an Apex controller
We need to create an Apex class first which will take our file data and create Content Version and Content Link records. Note that the Content Document record will be created automatically when you create a Content Version record. We will only create the Content Version record the first time. For next time, we will query that record and append the remaining file chunk and update back.
Now create FileUploadChunkController.cls Apex class and paste the below code.
|
1 2 3 4 5 6 7 8 9 10 11 12 13 14 15 16 17 18 19 20 21 22 23 24 25 26 27 28 29 30 31 32 33 34 35 36 37 38 39 40 41 42 43 44 45 46 |
/* Code by CafeForce || www.cafeforce.com || support@cafeforce.com || Mandatory Header */ public with sharing class FileUploadChunkController { @AuraEnabled public static Id uploadChunkedFile(Id recordId, String fileName, String fileContent, String contentVersionId){ try { fileContent = EncodingUtil.urlDecode(fileContent, 'UTF-8'); if(String.isBlank(contentVersionId)) { ContentVersion cvObj =new ContentVersion(); cvObj.Title = fileName; cvObj.VersionData = EncodingUtil.base64Decode(fileContent); cvObj.PathOnClient = '/' + fileName ; cvObj.IsMajorVersion = false; insert cvObj; Id contentDocId = [select id, ContentDocumentId from ContentVersion WHERE Id =: cvObj.Id].ContentDocumentId; ContentDocumentLink cl = new ContentDocumentLink(); cl.ContentDocumentId = contentDocId; cl.LinkedEntityId = recordId; cl.ShareType = 'V'; cl.Visibility = 'AllUsers'; insert cl; contentVersionId = cvObj.Id; } else { ContentVersion cvObj = [SELECT Id, VersionData,ContentDocumentId FROM ContentVersion WHERE Id =: contentVersionId]; String existingFileContent = EncodingUtil.base64Encode(cvObj.VersionData); cvObj.VersionData = EncodingUtil.base64Decode(existingFileContent + fileContent); update cvObj; } return Id.valueOf(contentVersionId); } catch (Exception ex) { throw new AuraHandledException(ex.getMessage()); } } } /* Code by CafeForce Website: http://www.cafeforce.com DO NOT REMOVE THIS HEADER/FOOTER FOR FREE CODE USAGE */ |
Step-2: Now we will create the fileUploadChunk Lightning Web Component.
For creating a new Lightning Web Component, use any IDE like VS Code.
Markup for fileUploadChunk.cmp
|
1 2 3 4 5 6 7 8 9 10 11 12 13 14 15 16 17 18 19 20 21 22 23 24 25 26 27 28 29 30 31 |
<!-- Code by CafeForce || www.cafeforce.com || support@cafeforce.com || Mandatory Header --> <template> <lightning-card title="Chunk File Upload" icon-name="custom:custom18"> <div class="slds-p-around_small"> <lightning-input type="file" label="Select Multiple Files" class="" onchange={handleInputFileChange} name="fileUpload"></lightning-input> <template if:true={fileName}> <div> <lightning-pill label={fileName} onremove={removeReceiptImage}></lightning-pill> <hr class="progressBar" style={progressBar}></hr> </div> </template> </div> <div style="position:relative;"> <template if:true={showSpinner} > <lightning-spinner alternative-text="Loading" size="medium" class="spinnerClass"></lightning-spinner> </template> <template if:false={showSpinner} > <lightning-button variant="brand" label="Upload" title="upload" onclick={uploadFiles} class="slds-p-around_small"></lightning-button> </template> </div> </lightning-card> </template> <!-- Code by CafeForce Website: http://www.cafeforce.com DO NOT REMOVE THIS HEADER/FOOTER FOR FREE CODE USAGE --> |
Now open the javascript file fileUploadChunk.js and paste the below code.
|
1 2 3 4 5 6 7 8 9 10 11 12 13 14 15 16 17 18 19 20 21 22 23 24 25 26 27 28 29 30 31 32 33 34 35 36 37 38 39 40 41 42 43 44 45 46 47 48 49 50 51 52 53 54 55 56 57 58 59 60 61 62 63 64 65 66 67 68 69 70 71 72 73 74 75 76 77 78 79 80 81 82 83 84 85 86 87 88 89 90 91 92 93 94 95 96 97 98 99 100 101 102 103 104 105 106 |
import { LightningElement, api, track } from 'lwc'; import { ShowToastEvent } from 'lightning/platformShowToastEvent'; import uploadChunkedFile from '@salesforce/apex/FileUploadChunkController.uploadChunkedFile'; const MAX_FILE_SIZE = 4718592; const CHUNK_SIZE = 750000; export default class FileUploadChunk extends LightningElement { @api recordId; @track fileName = ''; @track fileContent = ''; filesize = 0; uploadedsize = 0; showSpinner = false; handleInputFileChange(event) { if(event.target.files.length > 0) { this.fileContent = event.target.files[0]; this.fileName = event.target.files[0].name; } } uploadFiles() { var fileCon = this.fileContent; this.filesize = fileCon.size; if (fileCon.size > MAX_FILE_SIZE) { this.showToast('Error!', 'error', 'File size exceeded the upload size limit.'); } var reader = new FileReader(); var self = this; reader.onload = function() { var fileContents = reader.result; var base64Mark = 'base64,'; var dataStart = fileContents.indexOf(base64Mark) + base64Mark.length; fileContents = fileContents.substring(dataStart); self.upload(fileCon, fileContents); }; reader.readAsDataURL(fileCon); } upload(file, fileContents){ this.showSpinner = true; var fromIndex = 0; var toIndex = Math.min(fileContents.length, fromIndex + CHUNK_SIZE); this.uploadChunk(file, fileContents, fromIndex, toIndex, ''); } uploadChunk(file, fileContents, fromIndex, toIndex, cvId){ var chunk = fileContents.substring(fromIndex, toIndex); uploadChunkedFile({ recordId: this.recordId, fileName: file.name, fileContent: encodeURIComponent(chunk), contentVersionId: cvId }).then(result => { cvId = result; fromIndex = toIndex; toIndex = Math.min(fileContents.length, fromIndex + CHUNK_SIZE); this.uploadedsize = toIndex; if (fromIndex < toIndex) { this.uploadChunk(file, fileContents, fromIndex, toIndex, cvId); } else { this.showSpinner = false; this.fileContent = ''; this.fileName = ''; this.showToast('Success', 'success', 'Files Uploaded successfully.'); } }).catch(error => { if(error && error.body && error.body.message) { this.showToast('Error', 'error', error.body.message); this.removeReceiptImage(); } this.showSpinner = false; }); } get progressBar() { if(this.filesize > 0 && this.uploadedsize > CHUNK_SIZE) { var uploadedPercent = (this.uploadedsize / (this.filesize + CHUNK_SIZE)) * 100; if(uploadedPercent > 100) { return 'width: 100% !important'; } else { return 'width: '+ uploadedPercent + '% !important'; } } } removeReceiptImage() { this.fileName = ''; this.fileContent = ''; } showToast(title, variant, message) { const event = new ShowToastEvent({ title: title, variant: variant, message: message, }); this.dispatchEvent(event); } } /* Code by CafeForce Website: http://www.cafeforce.com DO NOT REMOVE THIS HEADER/FOOTER FOR FREE CODE USAGE */ |
Now finally paste the CSS in the fileUploadChunk.css file.
If the CSS file doesn’t exist. Right-click on the LWC component folder and click on create new File. Name it fileUploadLWC.css
|
1 2 3 4 5 6 7 8 |
.progressBar { margin: 0; height: 3px; width: 0%; background: yellowgreen; } |
Now, if you want to add this component to your Record Detail Page, add the below code to your component metafile.
|
1 2 3 4 5 6 7 8 9 10 |
<?xml version="1.0" encoding="UTF-8"?> <LightningComponentBundle xmlns="http://soap.sforce.com/2006/04/metadata"> <apiVersion>51.0</apiVersion> <isExposed>true</isExposed> <targets> <target>lightning__RecordPage</target> </targets> </LightningComponentBundle> |
Step-3: Now we will call the component.
To see the output, go to your Record Detail page, click on the setting gear icon on top and click on Edit Page. Lightning App Builder will open, find your component in the left sidebar and drop it onto the screen. Activate and Save the page and click on the back button. Your component will be visible now the screen now.
Customize the Chunk Size:
You can set your own Chunk Size at Line Number 6 of the JS File.

Also Check:
For any queries or suggestions, comment below.
Cheers … Happy Coding … 🙂


Thank you for the chunk file upload.
Using a bigger file will hit the size limitation and failing. For example, 10MB file. Do you know how we can leverage the same code for bigger files.
TIA.
Thanks for Appreciation. You can use lightning-file-upload for larger files or use apex method asynchronously.