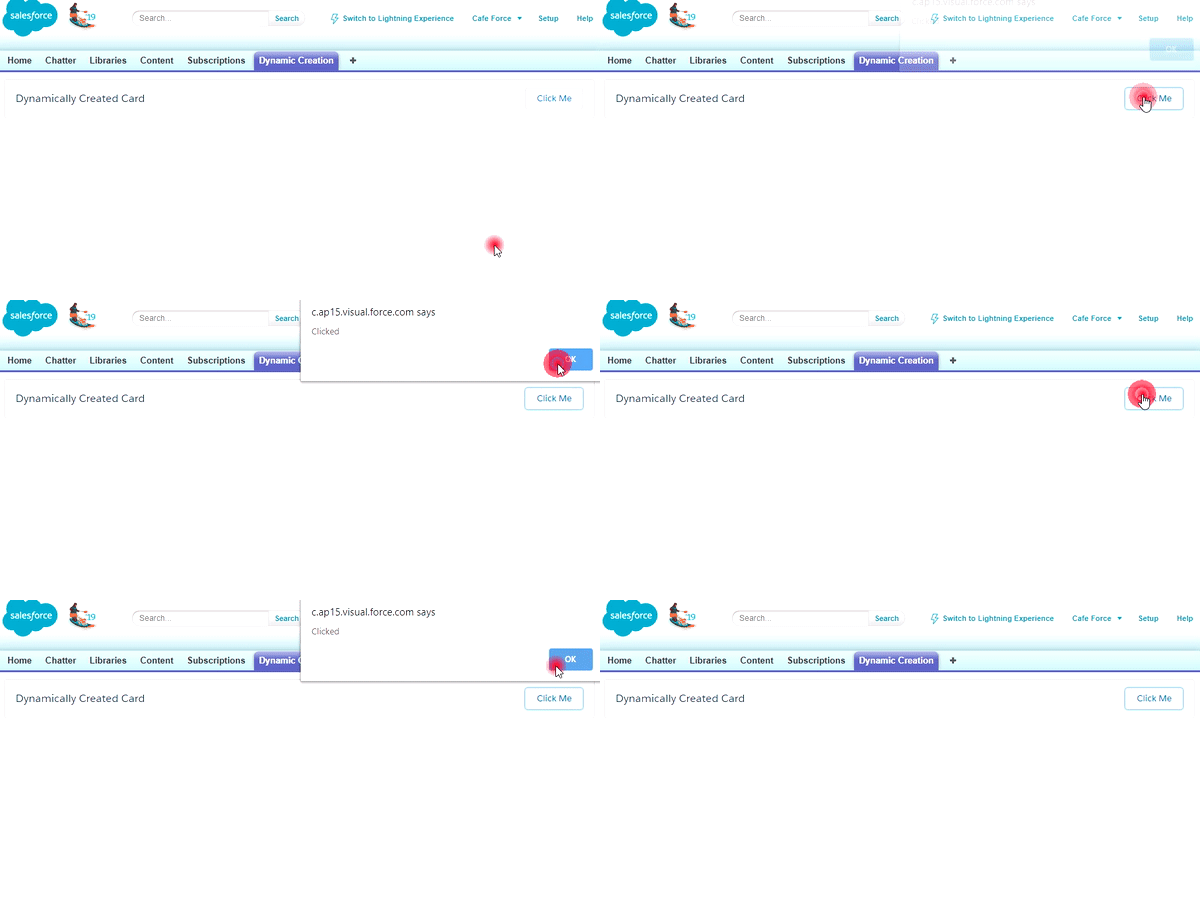
Sometimes our component markup code gets too bigger that we cannot write child components markup in the same parent. That makes our code too lengthy to write and understand and makes the component too heavy to handle. One better approach is Dynamic nested component creation. Dynamically create the components which we want to use for a shorter period or specific purpose. Dynamic create them and append them to our parent body and destroy them when their work is done to free memory again. This approach is more efficient and memory saving.
Dynamic component creation is easy to write and use. You can call your custom component or native lightning components. You can also create HTML tags dynamically and append them to any div of your choice. So, let’s create a component dynamically.
Demo GIF:

Step-1: Create the DynamicNestedComponents lightning component.
For creating a new lightning component navigate to Developer Console > File > New > Lightning Component
Enter Name & Description and click Submit. Now component markup file will open by default. In the right sidebar, click on Controller to create JS Controller too.
In the DynamicNestedComponents.cmp , paste the below code.
|
1 2 3 4 5 6 7 8 9 10 |
<!-- Code by CafeForce || www.cafeforce.com || support@cafeforce.com || Mandatory Header --> <aura:component > <aura:handler name="init" value="{!this}" action="{!c.doInit}"/> <!-- Div where dynamically created component will be appended --> <div aura:id="outerDiv"></div> </aura:component> |
Step-2: Add dynamic creation code to the JS controller.
open the controller file DynamicNestedComponentsController.js and paste the below code.
|
1 2 3 4 5 6 7 8 9 10 11 12 13 14 15 16 17 18 19 20 21 22 23 24 25 26 27 28 29 30 31 32 33 34 35 36 37 38 |
({ doInit : function(component, event, helper) { $A.createComponents([ ["lightning:card",{ "title" : "Dynamically Created Card", }], ["lightning:button",{ "label" : "Click Me", "onclick" : component.getReference("c.selectItem") }] ], function(components, status){ if (status === "SUCCESS") { var card = components[0]; var button = components[1]; card.set("v.actions", button); var outerDiv = component.find('outerDiv').get('v.body'); outerDiv.push(card); component.find('outerDiv').set('v.body', outerDiv); } } ); }, selectItem : function(component, event, helper) { alert('Clicked'); } }) /* Code by CafeForce Website: http://www.cafeforce.com DO NOT REMOVE THIS HEADER/FOOTER FOR FREE CODE USAGE */ |
Step-3: Now we will call the component.
|
1 2 3 4 5 |
<!-- Code by CafeForce || www.cafeforce.com || support@cafeforce.com --> <c:DynamicNestedHTMLTags /> |
Here we go, our component is ready to use now.

You can create nest many components, and destroying the outer component will destroy all inner components. This will make your component DOM friendly and light.
Go ahead… optimize your code…
Also, Check – Create and Destroy Lightning components Dynamically.
and Create Nested HTML Tags Dynamically
Cheers … 🙂


